Wednesday, May 28, 2014

Enchiladas Two Ways

The first time I had enchiladas was 11 years ago when my Mother-in-Law made them for me. Yum! They are my husband's favorite. So when she moved to California I had to learn to make them! A nice, easy dish; I have taken them to potlucks, made them for friends, and dropped them off for new mommies. Just like most of the recipes I share, there are several variations. I like recipes that can be switched up to satisfy the tastes of anyone! 
So, first the traditional beef and bean enchiladas. Here is the line-up: 
Ground Beef (or ground turkey) cooked with onion, chili powder, cumin, paprika, garlic, and S&P. I never, EVER buy taco seasoning packets. I just eyeball it. I have been doing this long enough that I don't even measure anymore. Here is a link to a recipe for taco seasoning mix in case you are not comfortable just throwing spices in. Add about a tablespoon of the completed mix. 
This is where there should be a picture of beans. Oops. You can do the beans a few different ways. Buy a can of refried beans, make your own "refried" beans in the crock-pot, open a can of black beans or pinto beans and use them whole. You can also soak your own beans overnight to use whole or mash. When I mash the beans I don't cook them but sometimes I add a little olive oil to them. You can also process them in a food processor with chili powder, cumin, and onion. I have done each of these. They are ALL good. 

Tortillas (flour or corn) Sometimes I make my own tortillas but I never use homemade tortillas in enchiladas. If you have a tortilla press you might be able to. Otherwise, just grab your favorite brand. 

Enchilada Sauce. You can use green or red, hot or mild. I have made salsa verde before and used it on enchiladas. It is SO good. Maybe I need to do a post on that...
I know...that is not the prettiest picture ever. Add your beans.

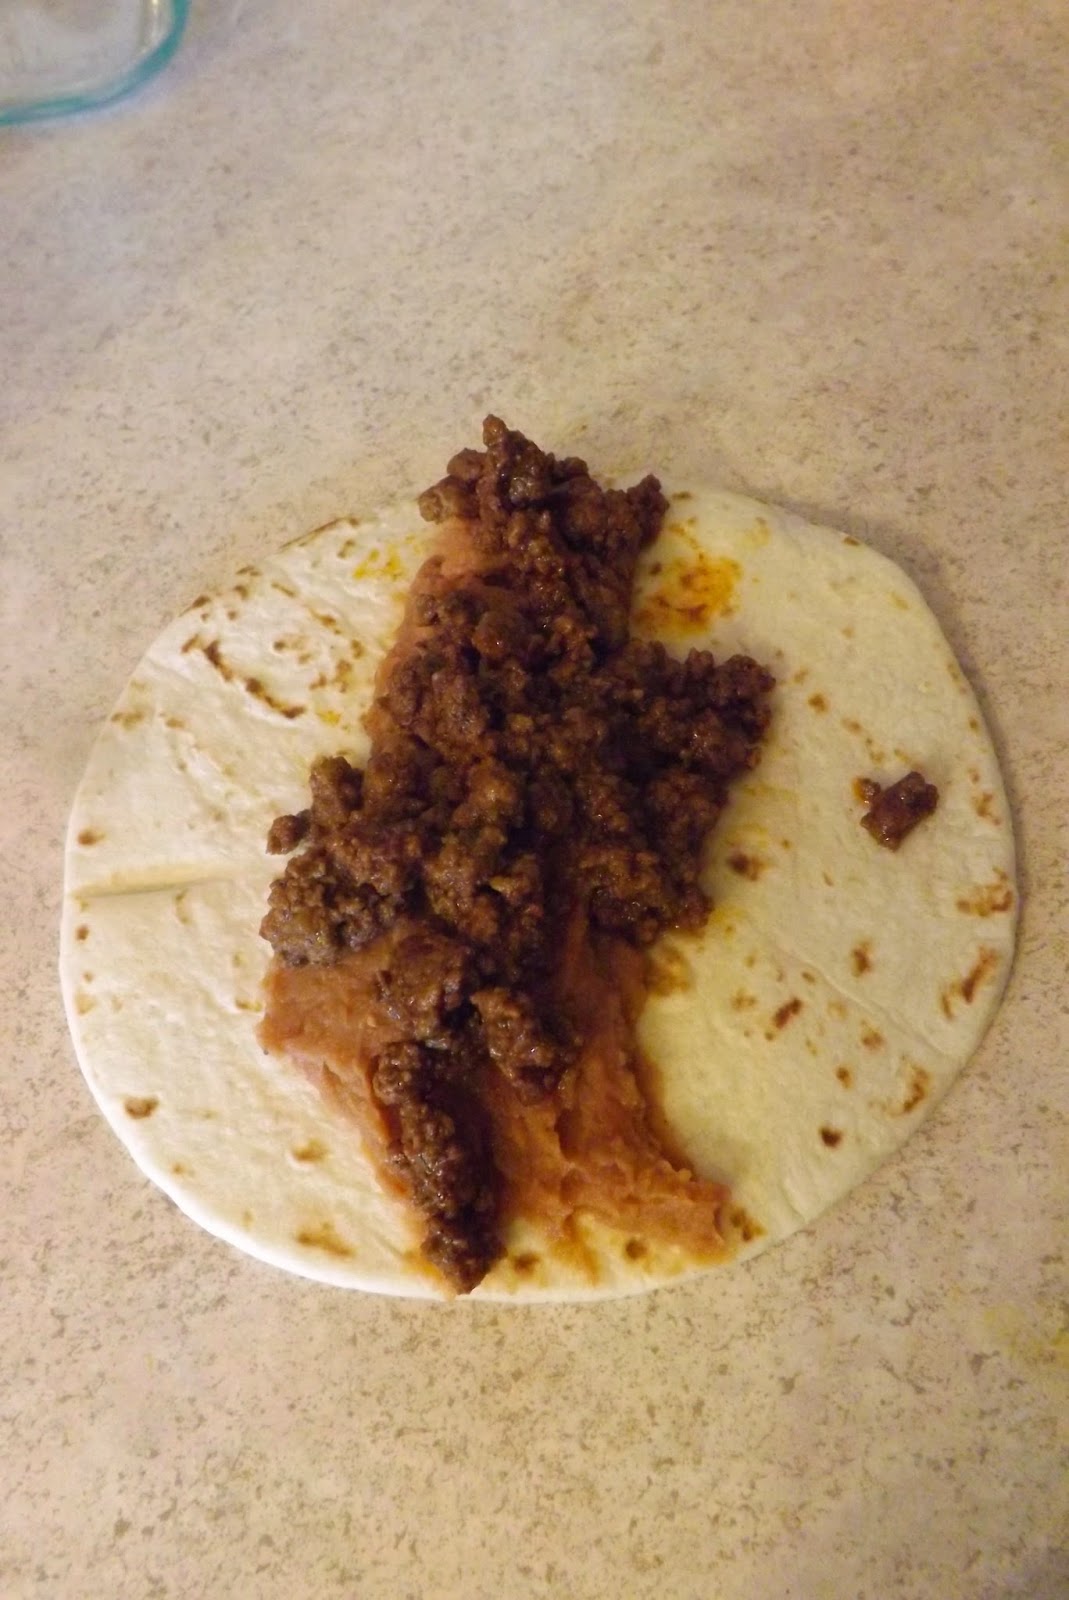
Also, not very pretty. Layer in your meat. This would be a good time to add cheese. You can omit the meat completely and have bean and cheese enchiladas. You could add only cheese and sliced onions! I always try to add more beans than meat because FIBER!
Roll the enchiladas tightly and place in a baking dish. 

Pour sauce over the enchiladas. You can cover them completely but I usually leave some of the tortillas exposed because I like them to get crispy. This would also be the time to top them with cheese. Chedder, or a taco or Mexican cheese blend is the best. Since my husband cannot eat cheese, I used velveeta. I do not recommend this unless you CANNOT have cheese. I usually do half the pan with real cheese for my kids. Top with black olives if you like. I do. Bake at 350 for 20 to 25 minutes. 


When we came back from our camping trip we had all these leftover sweet potatoes I had parboiled for foil dinners. We also had leftover onions, bell peppers, zucchini and squash. They were all diced and ready to go and I wanted to use them for something really yummy! Enchiladas seemed like the inspired choice. 


Cook the veggies in the same spice mix you would use for the taco meat. Or, if you are feeling adventurous, try this one. I LOVE it. It works best with green sauce though. I think red sauce would be strange. Cook until the veggies are soft. Since the potatoes were parboiled this did not take long. If you do not have sweet potatoes on hand, omit them completely. The enchiladas will taste great without them. I used 2 LARGE sweet potatoes, a medium zucchini, a medium summer squash, a green bell pepper and half a red onion. This should serve 4 with the sweet potatoes. If you are planning to omit them add 1 more squash and zucchini each.
Arrange the cooked veggies on the tortillas and roll up

Arrange in pan. Squish them in if you have to!!


Pour sauce over and add cheese if you like. I scraped the cheese off mine. Bake at 350 for 15-20 minutes. 

Blurry pictures, for the win!

There you go! Enchiladas two ways, with tips to make them your own. Enjoy!


A Bacon-licious Salad and a Bonus Salad

Bacon. What else is there to say? Well, a lot actually. Before I begin spewing poetic verses about bacon let me tell you about this amazing salad. The ingredients are simple and you probably have a combination of them on hand. Leave out anything you do not like and add anything you love. For me the MUST-haves are: iceberg, cherry tomatoes, cucumbers, black olives, avocado, chicken, BACON, and corn. Scallions are a great addition if you skip the corn.
Chop your lettuce to desired size. I cut it pretty small for this salad. 

Dice bacon in nice, big pieces. 

This is actually the leftover chicken from my crock-pot chicken post. So perfect for this salad! 

Cube your cucumbers. Slices don't work for this salad. 

Mmm...

Cube the avocado the same size as your cucumbers

I always halve my tomatoes. If you are going to use large tomatoes make sure you seed them. 

So here is the secret to what makes this my favorite dinner salad. When I was a kid, my parents made this super delicious side-dish; fried corn. It is seriously addictive...I don't make it very often because I can eat the whole thing myself. My parents recipe is basically a can of drained corn cooked in butter with onion and salt and pepper. I have done a few variations of it. Broiling it is really fast and easy. Spread the corn on a cookie sheet, spray with olive oil and sprinkle with S&P. Broil for 5- 8 minutes depending on how crisp you want it. I have added chili, cumin and lime. You can use cumin, coriander, and paprika. Really, anything you like. One thing I never do now is use canned corn. Frozen is so much better. Thaw it out, dry with paper towels so it gets nice and crispy when you cook it. I use about a pound but you can adjust for your family size. 
For this salad, I chopped half a red onion and cooked it in the bacon grease. Then I added the corn and some S&P. Um...GENIUS. 


Make sure to drain the corn! You don't want your salad swimming in bacon fat...or maybe you do. Go for it. I won't judge you. 
There it is. My beautiful, Bacon-licious Salad. I really want to be able to tell you that I ate this with a healthy yogurt based dressing or something. I can't tell you that. I poured ranch over it. It was delicious. 


The Bonus Salad
I found this yummy sounding dressing the other day and I wanted to make a very simple salad to try it out. One thing you can ALWAYS find in my kitchen is a huge bag of cucumbers. We eat them like crazy, especially in the summer. I try to keep tomatoes on hand as well but Fairy Girl often eats them before I can use them. Cherry tomatoes have been her favorite food since she was 2. Her Papa used to buy containers of them to surprise her with. I can't complain about my kids' eating habits. Onions, who doesn't have those on hand? Purple are the best for salads in my opinion. So, you take these three things and what do you have? A basic, simple salad that goes with just about any dressing. 
I had some bell peppers so I added those. Avocado would have been great! Chickpeas, too! 
The dressing was amazing by the way. I highly recommend it. Otherwise, throw some vinegar over it or lemon juice. S&P and you are good to go. 
What is YOUR favorite salad? 

Don't be fooled by the clouds. We did not get any rain. 


Monday, May 19, 2014

My Favorite Crockpot Chicken

I LOVE roast chicken! I really, really love it. For one thing, it is easy! For another, everyone in my family eats it without complaint. Roast chicken is great for leftovers, sandwiches, soups, casseroles, and another family favorite: chicken pot pie. I use the bones to make a nice rich broth, which I freeze in muffin tins. I can grab a couple pucks and add it to other dishes. Let's get real for a second though. Who wants to heat up their kitchen in the summer time to make a roast chicken? Not me! The best solution to that problem is my crock-pot. I adore my 6 qt. crock-pot. I use it almost everyday in the summer. You will probably get sick of the crock-pot posts. Unless you also adore your crock-pot. Then you have come to the right place! Welcome, friend.
So roast chicken is pretty straight forward, right? You throw it in the crock-pot with some salt and pepper and a little water or broth? Maybe you add a little lemon-pepper? And while that is delicious as well...it does not cut it for me. So I am going to share my tricks for an AMAZING roast chicken. These same tips can be used when roasting your chicken for real in the oven.

Place your veggies in the bottom of the crock-pot. I usually skip potatoes and go straight for the carrots and onions. Add anything you like but remember that whatever is down there will get a little mushy.


While prepping your veggies, quarter a lemon.

Then, add a tablespoon of your favorite spices to a quarter cup of soft butter, and mix. This is my favorite right now but I found it at Sam's Club and I no longer have a membership. *sad face*

Place your chicken on top of your veggies breast side up and carefully lift the skin away from the breast by sliding your hand inside. Be careful not to tear it but if you do it is not the end of the world. You want the skin to be loose but attached on each side. This is my #1 secret to amazing chicken. You are going to scoop up the butter mix with one hand and lift the skin with the other. Then "stuff" the cavity with the butter. Here is a picture that may help:
Sorry it is blurry. My photographer is nine. 
I always spread a little over the skin too. Putting the butter and spices under the skin means the meat absorbs the flavor better. I spent years putting seasoning on the skin but the truth is I don't eat chicken skin...yuck! So the spice never really met the chicken, resulting in a disappointment every time.  

The final step to preparing this amazing chicken is putting the lemons in the cavity. You can also add a quartered onion or a lime. Or all three. If you are using a lime, I suggest using chili powder and cumin in your butter. 
Then turn your crock-pot to high for 4-5 hours. My chicken is 4 lbs. If you are using a larger chicken you will need to lengthen the cooking time. Be sure to check with a meat thermometer. 165 is the recommended internal temperature for whole poultry. 

This is seriously the best chicken ever! I have to thank my husband. He found a video by Gordon Ramsey that showed the technique of putting butter under the skin. I usually serve it with a salad or extra veggies. Sometimes I don't. 


Staying Cool and Hydrated in the Desert

Well, it may not be Summer according to the calendar but yesterday it was 99 degrees here in Southern Arizona. It can be very difficult to stay hydrated here with very little humidity and the hot hot days. My kids will only drink so many bottles of water before they begin to protest. I should be consuming 100 oz. every day...Granted some of that can come from foods with a high water content but I try to drink 100 oz anyway. My kids are supposed to have 55 oz. of water each. ON A DAILY BASIS!! So around a half gallon of water.
In the summer time we eat a ton of high water content foods. I made this little chart based on our favorite fruits and veggies:

But even my little rabbits will only consume so many fresh fruits and veggies without getting a little bored. So I have several other ways of keeping them hydrated.
One of our favorite things to make for breakfast is smoothies! My kids LOVE them. This morning we were getting ours ready and Fairy Girl asked "Did you get new fruits?" When I told her I had bought some new fruits (by the end of the week we are usually down to bananas and strawberries) she did her happy dance. Smoothies never really get old if you switch up the ingredients. This week we are going to try out some peanut butter powder. We will eat smoothies any time of the day. In between meals I leave out the dairy and almond milk and just add fruit, water, and ice.
Smoothies are great because they are totally customizable. Anything you or your kids do not like can be left out. I always start with frozen bananas for ours. I buy bananas in huge batches when they are on sale or I buy the bags of "ripe" bananas that are always marked way down. I have seen websites that say you can throw the whole banana in the freezer, peel and all. Let me just say, this is a terrible idea. The peel breaks down and as you try to peel it you end up with a gloppy mess of peel. It is worth the extra time to peel the bananas before you freeze them. I cut out any mushy parts and cut the bananas in half. The trick is to place them on a cookie sheet and freeze them individually before packing them into freezer bags. This way they do not freeze together.
Another ingredient I always have on hand is almond milk. It has protein and calcium and adds a nice creamy quality. Greek yogurt is terrific in smoothies and my favorite is Greek God's Honey Strawberry. So good.
There are countless smoothie recipes out there so I am only going to list our two favorites. Keep in mind these are recipes for four.

Strawberry Banana Smoothie

2 whole fresh or frozen bananas
6- 8 fresh or frozen strawberries
1/2 C of almond milk
1/2 C of strawberry greek yogurt
Water to taste (I usually add a cup or two but some people will want a thicker smoothie)

Stack ingredients in order listed and blend. If you are using all fresh fruit you will want to add ice as well. Otherwise you are going to end up with more of a fruit puree than a smoothie. You can also add any types of berries you have on hand. Blueberries are a favorite here because they turn the smoothie purple. The powdered peanut butter was also very, very good in this one! Enjoy this adorable shot of Cy-guy enjoying his smoothie this morning:

Tropical Smoothie

2 whole fresh or frozen bananas
1 or 2  frozen orange juice or pineapple juice "pucks"
1 C frozen pineapple chunks
1 C frozen peaches
1/2 C almond milk
Water to taste
Stack ingredients in order listed and blend.
Juice pucks are simply fruit juice frozen in muffin tins or ice cube trays. If you don't have any juice pucks on hand then skip them! Don't rush out and buy a ton of ingredients. Just use what you have. If you like your smoothies sweeter, add honey. I would not recommend using anything other than a liquid sweetener though. Grainy smoothies aren't very yummy. 
Many people add greens to their smoothies or ground flax seed, proteins powders, sprouts, etc. 

Another great way to keep kids hydrated is popsicles!! But not the ones from the stores! They are full of sugar and food dyes. There are healthy options, such as all fruit bars or fruit and yogurt pops. I can never stomach paying $5 for a box of frozen pureed fruit or fruit and yogurt.
So of course, I make my own. The kids love to help with these (and the smoothies as well). We try and get creative and try new flavors but we also make some that only take a minute or so to assemble. 

Strawberry Yogurt Pops

Strawberry yogurt of your choice
Popsicle mold

Fill mold and place in freezer for 5 hours. So simple I almost feel silly typing it out as a recipe!! This of course can be made with your favorite yogurt flavors and you can even chop fruit up and mix it in with the yogurt. This will help make the yogurt last longer as well. Just make sure to check the labels because many yogurt brands use food dye.

Pineapple Pops

3 C frozen pineapple chunks
1.5 - 2 C almond milk 
1 tbsp honey (optional)
Blend ingredients in a food processor You can use a blender but unless you have a powerful one you may need more liquid. Fill molds and freeze. If you use less liquid (closer to 1 cup) you will get a glorious concoction that tastes just like the Dole Whips at Disneyland. 

I also offer my kids flavored waters. Not the kind from the store with syrups in them but the homemade variety. I slice fruit and add it to nice icy glasses of water. Lemon, lime, oranges, grapefruit, apples, pineapple, watermelon, and cantaloupe are all great choices. If your kids are used to fruit juices and you are trying to break them of the habit (I am not a fan of juice) you can add a splash of their favorite with slices of the matching fruit. This does not work great with orange juice though! Cranberry may be a better choice with a few slices of oranges. 

I try to keep all of the ingredients for these yummy treats on hand all summer!! Very soon we will be in the triple digits every day and I like my kids to have healthy options that cool them down. What are your favorite hot weather treats? 

Isn't he precious? 


Tuesday, April 29, 2014

My Favorite Quiche

When I was a kid my mom made quiche all the time. I was actually very surprised as I got older to learn that most of my friends had never tried quiche and those that had were talking a frozen appetizer. This quiche is SO easy. I have been making it since I was around 12 years old. The original recipe was actually for a double batch but I cut it in half because only three people in our family of five actually LIKE quiche. If you are cooking for a crowd double everything and make a second pie crust. It is a very quick dinner to put together but make sure you take into consideration the baking time of 40-45 minutes.

You start with your favorite pie crust. This is mine and it is soooo easy! Are you picking up on a theme? So here is my crust:
 And then you will want to bake it in a 400 degree oven for ten minutes. I don't have any pie weights so I use beans but if you don't weigh the crust down before baking you will get a puffy crust:
I always do the meat and veggie prep while my crust is in the oven. In this quiche I am using sliced tomatoes, diced bell peppers, onions, and bacon. The possibilities are endless though. My mom usually made taco quiche with leftover taco meat. Ham is really good! Throw in your favorite cheese too. We skip the cheese for dietary reasons. Pretty much anything in your fridge can go in a quiche.

                            Here is a beautiful picture of onions cooking in the the bacon fat: 
Ok, the picture is not beautiful but the smell was!
When the crust comes out of the oven you can give it a few minutes to cool and then arrange your veggies, cheese if you are using it, and cooked meat:
At this point you will want to turn the oven down to 375. Now to make the custard!! This is my favorite part because it means dinner is about an hour away.


You will need 4 eggs ( I used 5 because my silly hens are laying smaller eggs than they usually do). Enjoy this picture of our fresh eggs:


You are going to combine the eggs, 1.5 cups of whole milk (or cream), 2 tablespoons of butter (please don't use margarine!! Ew!!) 1 tablespoon of flour, a pinch of salt, a pinch of nutmeg, and a pinch of cayenne. The cayenne is totally optional but the nutmeg is not!!! It makes the quiche! (Okay, it really IS optional. If you don't have any in the house you don't have to run out and get it before you make this delicious meal.) Beat all of these ingredients together.


Sadly, some of the pictures are blurry because I used my phone instead of my camera. Bad idea.
Make sure you cover the edges of your crust with tin foil. You will remove this for the last 10 minutes of baking. Then pour the custard over your fillings:

You may have a little extra custard depending on how many fillings you used. Nothing wrong with that! I usually give any extras to our dog. He loves eggs! You could also scramble it if you don't have a dog and you hate wasting food. In the picture above you can see the quiche is sitting on a cookie sheet. This just makes it easier to put in the oven without spilling anything. If you are an expert at putting liquid filled pies in the oven without spilling feel free to skip this step.

Bake for 40-45 minutes. Don't forget to remove the foil from the edges of your crust for the last ten minutes. The best way to tell if your quiche is cooked all the way through is to give it a little jiggle. It should move about as much as a pan of FIRM jello. Don't stress too much though. If you take the quiche out of the oven, slice it and discover that it is not quite done you can pop it back in. Alternatively, you can place an individual slice in the microwave for 20 seconds.


There it is! My favorite quiche! Great for brunch or dinner. Great for company or just a nice meal at home. I usually make a nice green salad to have with it. I hope you try this recipe soon and love it as much as I do. The full recipe for the custard is below. Feel free to copy and paste to print!!


The Best Quiche Custard Ever!!

4 eggs                                             pinch of salt
1.5 cups milk                                  pinch of nutmeg
2 tbsp melted butter                       pinch of cayenne
1 tbsp flour

Pre-heat oven to 375 Beat eggs, milk, and butter together. Add flour and spices and beat until blended. Pour over fillings of choice in a prepared crust. Bake for 40 to 45 minutes, until firm. Allow to cool 5-10 minutes before cutting.

I would like to end each post with a little bit of Arizona beauty so here is a picture of our beautiful (and rare) clouds last Saturday: